
Do you create presentations in your job? Do you want to create a media kit for your website? Then consider checking out Visme to give them a boost.
As someone who has worked in a lot of offices as an administrator that involved me creating data charts, financial reports and slideshow presentations on a regular basis, I was intrigued when I was told about Visme.
Just to be clear, Visme isn’t just for presentations, it can be used for creating graphics for your social media and blog, build reports, create visually-appealing menus or flyers.
Disclaimer: I was provided with access to a paid version of this program in return for my honest thoughts. I have spent the last few months testing out different features and creating documents on Visme. All thoughts and opinions expressed herein are my own.

What Is Visme?
Visme is a data presentation and visualisation tool. It allows people to make visually-appealing documents, infographics and the likes.
It has an appeal not just for graphic design work but also for business allowing you to turn reports, instructions or data charts into something more compelling.
Its layout has an easy to use feel with clear details on how to make changes to your document as well as a large variety of ready to use templates.
Templates
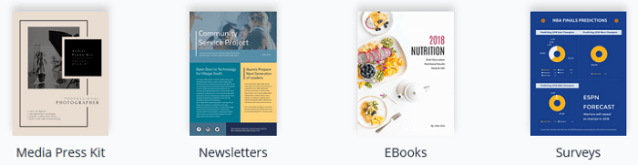
Visme gives you a lot of different templates to get you started. The first level is the main categories as per the below image:

Once you have decided which of these types of document you want to create, you then see another level where it breaks down into different types.
For example, under Documents, here are the following template options you can the select.
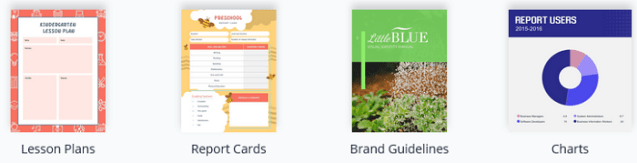

From this, you can then reach another set of more defined templates you can use to better suit your needs.
There’s something for everyone in these templates, whether you are creating infographics for a blog, reports for the meeting or a lesson plan for the classroom.
Make it yourself
Each of the templates, if you hover over them, give you the specific dimensions. This is important as different documents or graphics are better in different sizes. Most of the dimensions appear to be the standard ones expected for the specific templates.
However, you do have the option to create your own sizing using the Custom Size button.

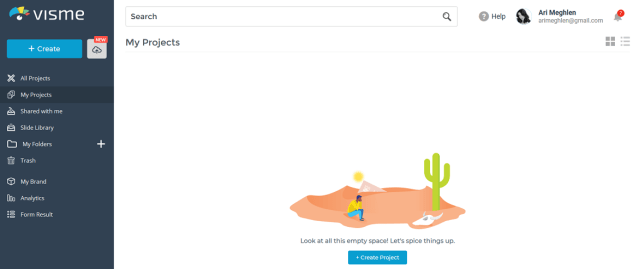
Project Dashboard
When you first log in to Visme, you are met with the Project Dashboard view. This is where all your projects will be visible and accessed. It’s from here you start to create projects. (I took this screenshot at the very start of using this to show you how it looks empty).
Menu Bar
 On the left of the project dashboard is a menu bar.
Here is the option to create a new project with the Create button.
You can select All Projects which, if you collaborate with a team, will show all the projects you and the team have worked on here.
My Projects just shows the projects you created yourself.
Shared With Me allows you to filter out the projects that were shared with you by another user.
Slide Library* is where you keep what is known as “universal slides” that can be used within any of your presentations. Think of them like Master slides or template slides.
So if you always want to end a presentation with, for example, a list of contact numbers or social media links, rather than having to recreate this slide for every new presentation, you simply save it as a Universal Slide within the Slide library.
* A great feature is that if you update the universal slide within the slide library, it will automatically update in every presentation it is included in.

My Folders / Slide Group is where you can create folders to keep certain slides together.
Once you select the + symbol, the following dialogue box will appear for you to create a new folder.
Trash is pretty obvious. If you delete a project it moves into your Trash folder. It will remain there for 30 days before being permanently deleted, so you do have a 30-day window in which to retrieve anything you may have deleted by accident.
~ ~ ~
My Brand is a great feature that allows you to create a “brand kit” so you can keep consistency across all your work and makes branding your documents quick and easy. Here is what it looks like when you click My Brand.

You can choose from 120 fonts or upload your own specific font if your preferred one is not included in the library. You can select the fonts you want and then define which is the default for things like headers and body text.
You can create your own colour palette as long as you know the hex code for the colours or you can use the palette wheel to choose the colours you want for your branding. This will then give you the hex code for future reference.
Under Templates, you can add existing projects you have made into this section and they become templates. This is great for teams especially if you need to keep things, like reports all very consistent.
You simply have to make it once then upload it to templates so everyone can access it and create new reports (or whatever you choose) that match the template.
Logos allows you to update your own logo which will automatically replace the Visme logo that can appear on documents.
Brand Links allows you to input your links including website, social media and email. These can then be added to documents quick and easy rather than having to type them in every time you want to create a link.
~ ~ ~
Analytics is a feature that allows you to track all the traffic of your projects which can be useful if you want to see how effective a specific project has been.
Form Result is the last option on the menu bar and honestly, I’m not sure what it’s for. It wasn’t clear to me and the help option didn’t really clarify it. All I can share is what it looks like when you click it.

 There was also an Upload button near the top. You can upload existing PowerPoint documents into Visme and they will become editable in the program, giving you access to all the features that are not available within PowerPoint.
Create A Project
When you are ready to create your project, simply click the blue button and you’ll be taken to the templates page.

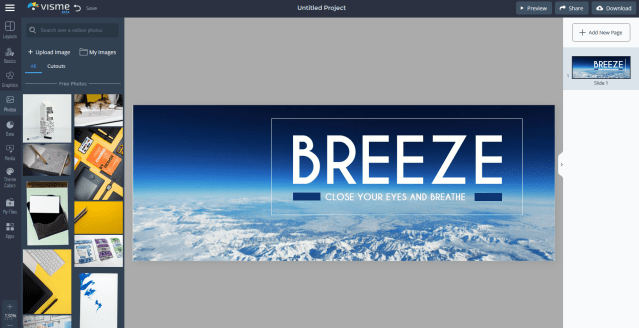
I selected a Charts template from under Documents.

On the left is a menu bar for making the relevant changes to your project.

There are 8 main sections in the menu bar:
Basics – this covers things like headers, text, stats & figures, graphics & text, diagrams and My Content.
Graphics – this includes shapes, arrows, lines, icons and animated graphics. (I did like the animated graphics library. However, in regards to using things like shapes – I found it frustrating that while guiding lines appeared when you selected and moved a shape… if you attempted to alter the size of the shape the guiding lines didn’t appear so I couldn’t always line them up AS I was changing their size)
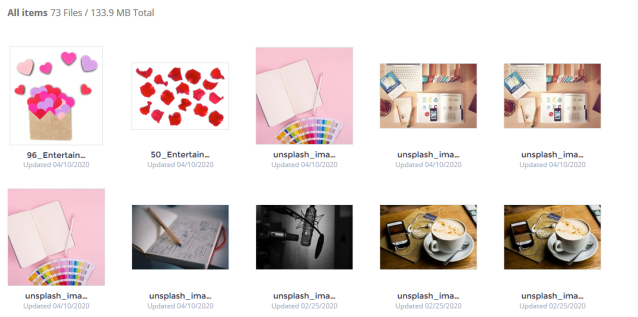
Photos – this is the Visme library of over 1 million high-quality, royalty-free images. (I always like that you are given a good size library, though I tend to almost always find my own images and import them.)
Data – there are lots of vector images that can be used for data, these can be charts, maps, tables etc.
You can add in your own data manually or even upload an Excel or Google spreadsheet to pull data directly from that.
Media – this is where you can add in video, embed online media and audio. In the video library, there are over 500 stock videos you can use.
Theme color – there are blocks of colour palettes to choose from, this can also be were your branding colours can be stored.
My Files – here is where you have the option to upload your own images, photos, video and audio.
Apps – you can include a URL from certain apps and then set settings like mute, autoplay and loop.
Currently (as of writing this) the apps available to use are YouTube, Vimeo, Wistia and Vidyard. However, they are adding more soon including DropBox, Google Maps, Instagram, Google Drive and more.
~ ~ ~
Slide Window
There is a Slide Window on the right where you can create a multi-page document, and this works much like a PowerPoint. The slides can be added, duplicated, relocated into a different order.
You can also use the Preview button at the top right that will give you a full screen and run through your presentation or run your video/animations etc.
Picture Toolbar
You can make changes to your document by using the toolbar. Simply click on the document’s image (such as the background) and the toolbar will appear. This toolbar is specifically for pictures.

Background
You can change the background of the document using a picture you have uploaded or selecting one from the library. There are plenty of background images to choose from and these are from Unsplash.
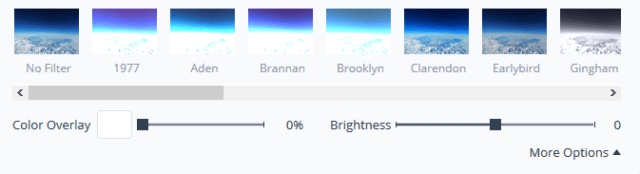
Filter
Filters can be selected to add over the photos and images in your project. These can give a nice consistency to your brand by using the same filters on each document.
Flip & Scale
Flip allows you to flip your picture either horizontally or vertically. Scale allows you to scale up or scale down an image or photo in the document.
Canvas Size
 This is an option that gives you the chance to change your document automatically to a different size.
This means you can create a project and then shift the size to match different social media platforms, as each platform has a specific dimension that works better.
Not only does it allow you to change the sizes to match different social media posts, but you can also change it for header sizes (eg Facebook header, Twitter header etc) as well as Ads such as Facebook Ads.
Remove background
A quick and easy way to remove a background image.
~ ~ ~
Text Toolbar
If you select the text on the document, a different toolbar comes up to allow you to make changes.
On the left, there is just an Edit button and a More button
![]()
If you click the Edit button it opens up the below options. I’m not sure why these options were not just already accessible. I’m not a fan of having to click extra buttons to reveal commonly used tools when there was definitely enough space for these tools to be listed.
Apparently, if you double click the text, the below options appear automatically.

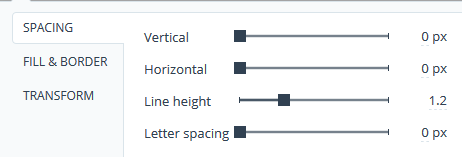
If you click the More button, this gives you the option of making changes to the line and letter spacing, fill and border.
On the right, is another set of tools:

Effect allows you to add shadow to your text and change the opacity.
Animate gives you the chance to have movement to your document. You can choose from several methods to have the text enter and exit the document, such as pop out, zoom in, fade in, fly in from left, right, top etc.
There is also a time set for you to mark how many seconds it will take for the text to appear allowing you to decide on how fast or slow you want it.

Arrange allows you to move the text forward and back so it can be brought to the front or moved behind another aspect on the document.
The Paintbrush icon is the copy style option, so if you have text in a certain colour, style and font you want to replicate you can use the copy style tool to select those styles and then highlight other text and it will change to match the style.
The two documents icon represents Duplicate, this can copy and paste your selected text with one click.
The Link icon allows you to add URL links to your text and Trash obviously deletes the text.
In regards to the colour palette offered when you want to change the colour of a shape or text, I wasn’t a fan of this. As whenever I used it, the main colours seemed “hodge-podged”. I am used to uniformity to a palette with black and white being clear and then the main primary colours flowing out in somewhat of an order such as all the blue shades together, all the green etc.
Whereas I didn’t find this and spent more time using the colour wheel option where you can finely pick your preferred shade.
Saving
Visme autosaves your projects as you are working on them. In the top left of the screen, it tells you if your project is currently saving, has failed to save or if your changes have saved.

You can actually turn off the autosave via the menu icon which I will discuss below. However, you will then have to remember to manually save your work. I personally prefer autosave as my computer has a nasty habit of crashing.
Publishing
Once your project has been completed, you can then “publish ” it. In the top right, simply click the Download button and it takes you to the following options. Here you can choose how you want to download your project.
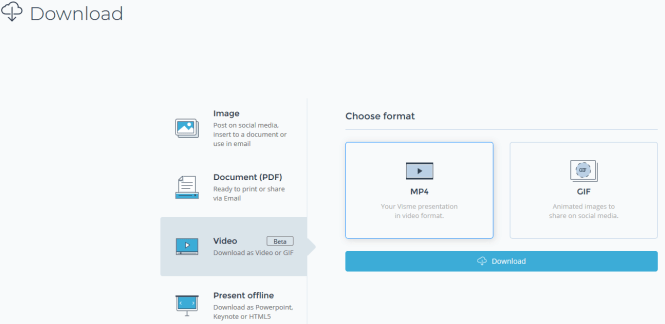
You can choose from Image, PDF Document, Video and Present Offline. Each of these choices gives you further options. As per the above screenshot, selecting video that gave me the chance to choose MP4 or Gif.
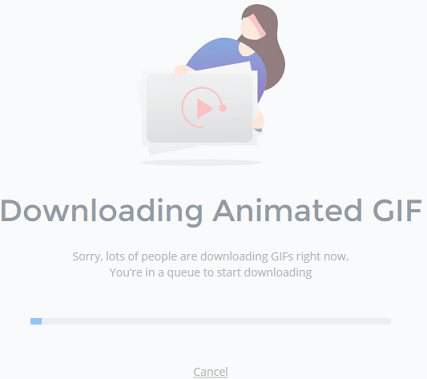
However, when I did test the animation option (I love me some animation) even just downloading the gifs I got this message (below) almost every time and it took quick a while before it finally downloaded my gifs.
There were also a few times the download failed after I’d waited.
I appreciate that a lot of people were downloading gifs, but it did make me wonder how it would handle downloading MP4 videos on a regular basis.
Menu
There is a menu at the top left-hand corner, identified as 3 horizontal lines. This lets you go back to your main dashboard, check your account details, view options etc.

Support
Visme has it’s own YouTube channel that is chockful of tutorials talking you through any aspect of using the program you may need.
When you create an account, you also get emails with updates and details about using the features. These can be helpful, especially has Visme is still adding things to their program. However, if you decide they aren’t necessary simply unsubscribe.
Pricing
Visme has three tiers of pricing, Individual, Business and Education.
For each of these tiers, there are three pricing package options so you can select one that works the best for you.
See below the different options and what you get for each pricing set:
Individual Pricing Packages

Business Pricing Packages

Educator Pricing Packages

My Thoughts
I found Visme to be quite a strong platform, it is graphic design meets presentations. I’ve used PowerPoint a lot in my working life so I appreciate having these two aspects merged into one platform and it certainly makes presentations more vibrant.
This program is definitely good for anyone who needs to go beyond just creating graphics for social media or websites.
If you create reports or have to do presentations for your business, this gives you some excellent features beyond what you would get from basic PowerPoint allowing you to move up a level. This program makes it easy for people to create well-made content without having a degree in graphic design.
I especially like the My Brand option for allowing you to keep brand consistency. I also like the ability to create visually-compelling data charts that can be manually updated or pull data from imported Excel charts.
It is an easy to navigate platform and I appreciated the YouTube videos and extra help videos that also appeared on the Dashboard.
There are some parts I wasn’t happy with, as I’ve mentioned… like the colour palette set-up, the lack of guiding lines while making size changes to shapes, I also found the text would sometimes change size.
If I copied and pasted a block of text, the copied block would suddenly have a different text size than the original. So I was forever going back in to change the newly copied text to the original size. I also didn’t like having certain toolbars that were not automatically visible and the download seemed to take a while.
Though in reference to the download issue, I have been testing Visme during the Pandemic lockdown and so more people have been at home and maybe using programs like this and thus larger traffic on a program will cause delays.
There is scope for writers to use this program for their marketing by creating Media Kits, teaser graphics, short videos or gifs etc and the Brand Kit would come in handy for that.
Overall, I think it’s definitely a useful program especially if you create a lot of business documents and want to make your presentations, reports, charts and documents more impactful. There is a free pricing option so you do have the option to try Visme out first to see how it works for you and your needs.
Want to give it a try?

~ ☆ ~ ☆ ~ ☆ ~
Thanks so much for taking the time to read through this very long blog post!
Happy writing

Pingback: A Review Of Visme Forms – Author Ari Meghlen Official Website
The interface reminds me a lot of Canva, but I think there’s some additional functionality here (especially if you upgrade). Still probably going to stick with GIMP and handmade crap because I like that kind of torture, it seems.
Definitely more functionality, and scope for projects and presentations. I think even on the free version you still get a lot of useful tools and workability.
LOL I like GIMP I used to use it to touch up my photos but I found it a little temperamental. I couldn’t imagine using that for creating social media graphics, I love me some easy drag and drop and template sizes made ready. LOL now all I need is someone else to make them for me so I have more time and I’d be set!! 😁
Haha – I don’t know why I do some of the things I do. Though for graphics it’s definitely better access to freeware fonts. Love me some retro fonts.
I was expecting another PowerPoint, but that looks really nice!
Thanks Yari, yes I was pretty pleased with it. When I first was given access there was some bugs but they have been actively fixing some issues and it’s working really well.
I have been using it to create my World Book for my fantasy novel series.